

Ah, the joy of an aperitif that never fails: pissaladière is the go-to dish for treating your guests.
The word "pissaladière" comes from the Niçois pissaladiera, derived from peis salat (salted fish).
The pissalat is an old Niçois preparation made from anchovies and baby sardines, salted and macerated with herbs and spices. This condiment gave the tart its typical flavour before it was replaced by whole anchovies.
Pissaladière appeared in Nice around the 14th century. It was originally a dish for fishermen and people of modest means, made with simple ingredients: bread dough, onions, olive oil, pissalat and black olives. It is related to other Mediterranean flatbreads such as Italian focaccia. That is why here we will make a pissaladière and a focaccia (pugliese) at the same time, since some people struggle a little with anchovies. That said, I know people who changed their minds after tasting my pissaladière: they admit they don't really like anchovies, but this is different, and as they put it, it's "to die for".
Right! Enough chatter, let's get down to business: the recipe. What do we need to make this pissaladière?
Equipment:
- A dough mixer or stand mixer with a spiral dough hook
- A dough scraper
- A silicone spatula
- A deep baking tray
- Baking paper
- A rolling pin
- An oven with two racks
Topping for the pissaladière
- 1 kg white or yellow onions
- 15 salted anchovies (not in oil, this is important)
- 40 black Niçoise olives
- 20 cl virgin olive oil
Topping for the focaccia
- 24 small cherry tomatoes
- 8 to 10 basil leaves
- Salt
- Pepper
The dough
- "00" flour (Italian) or type 45 flour (French)
- Water
- Salt
- Fresh yeast
- Olive oil
I don't give quantities for the dough here because it depends on personal taste, i.e. whether you prefer a thicker or a less thick dough. I deliberately avoid the word "thin", because a pissaladière dough should be fairly thick and very soft.
To help you make the dough, OONI (a maker of very good pizza ovens) has released an app. You'll find the QR code to download it below.

I'll give the recipe for a thick, very soft dough for two trays: one for the pissaladière and one for the focaccia (pugliese). This is also the quick version, about 4 hours from start to finish. For longer versions, you extend the dough's proofing time (in the fridge), which lets you prepare it in advance and work it when you're ready.
The dough
We start the dough by mixing the liquids first (here, only water), then adding the dry ingredients, following the quantities in the example below:
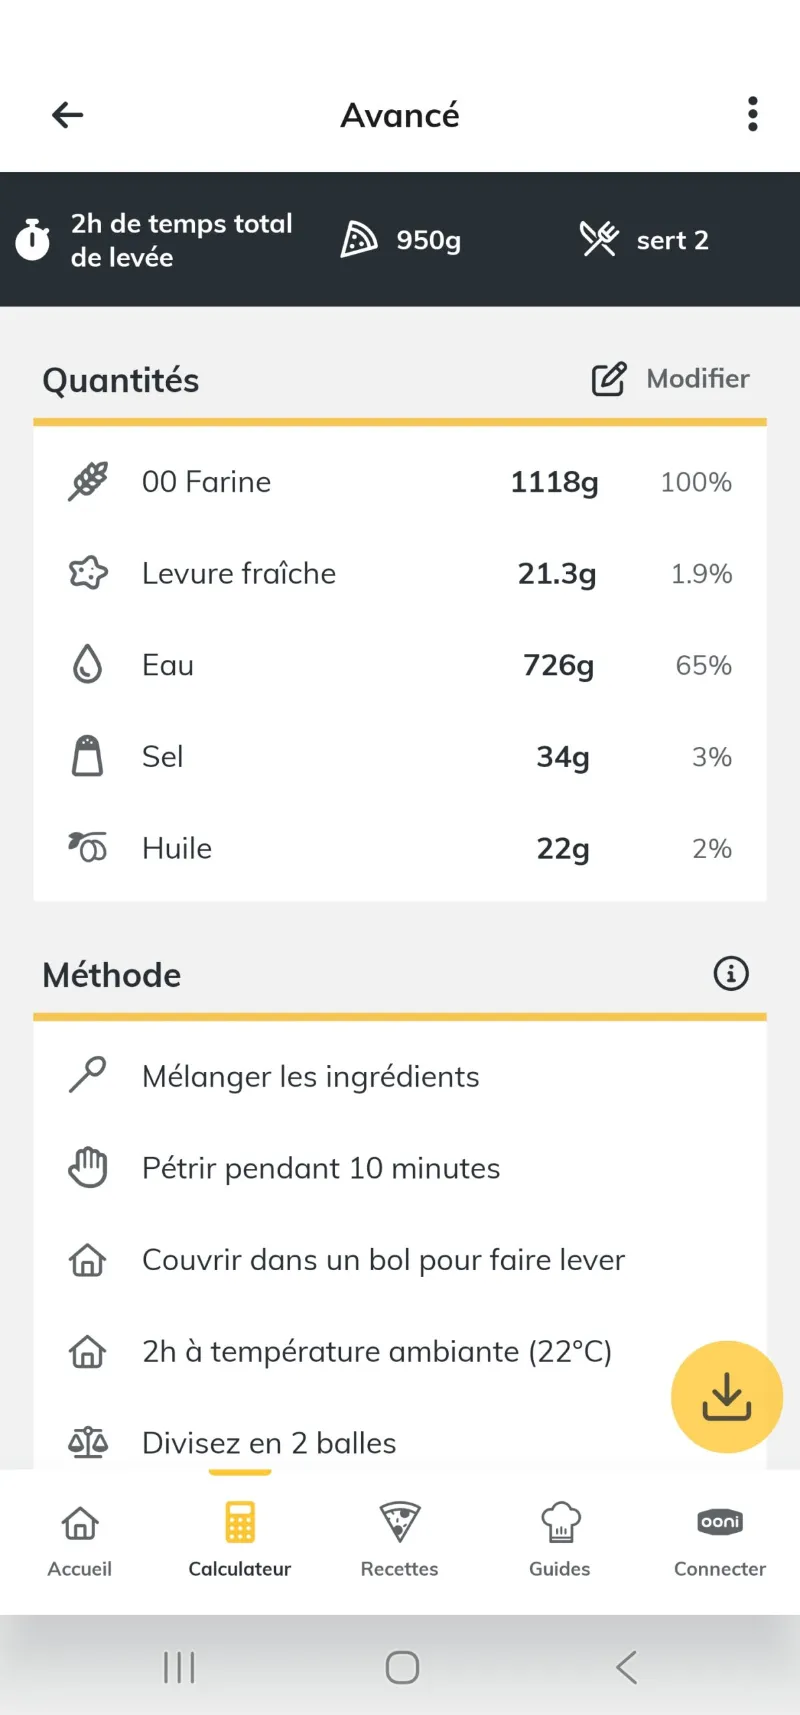
The water is filtered, and the quantity here is 726 g.

Add the salt, 34 g. Stir well so the salt dissolves: this keeps it from coming into direct contact with the yeast, which would kill it and stop the dough from rising.

Once it has fully dissolved, add the flour, 1118 g.

Weigh the fresh yeast, 22 g. Yes, it's hard to get exactly 21.3 g, but this isn't a competition.

Crumble the yeast into the bowl over the flour, spreading it roughly.

Add the olive oil, 22 g, before starting to knead.

Here we go: knead at low speed for 5 minutes. At the start I often use a spatula to push the ingredients towards the centre, especially with a stand mixer and a spiral hook.

After 5 minutes, increase the speed for 10 minutes. The goal is a nice, smooth dough.

After kneading, I always put a little olive oil between the dough and the bowl and gently release it by turning with the dough scraper, before dividing it into two pieces of 900 g each. Then I prepare a sheet of baking paper to spread and stretch my first piece of dough.

Once it is spread and roughly shaped, slide the dough into the baking tray. It's always much easier to pre-shape the dough outside the tray than inside it. You can start stretching by hand and finish with a rolling pin if needed, but be careful not to flatten the dough too much: leave it some volume. One important thing for the rise: coat the dough well with olive oil so it doesn't dry out while rising in the oven. This also avoids plastic film, which isn't great for your health. I also advise against a damp cloth, which can stick to the dough.

Repeat exactly the same steps with the second piece of dough, and place both filled trays on the oven racks, with the oven set to 30 °C to speed up the rise.
The pissaladière topping
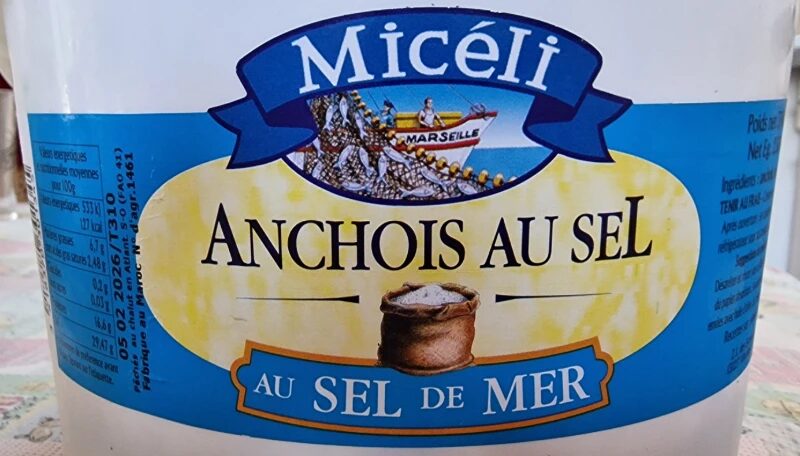
Two things need preparing: the onions and the anchovies. Here I used yellow onions, so they need to cook a little longer, but the result is just as good. As for the anchovies, remember that you must use salted anchovies, not anchovies in oil. This is essential: anchovies in oil don't melt into the oil, and as you'll see, they need to break down completely in the hot oil.

First, cutting the onions. There are several schools of thought: some say to slice them into strips, others into cubes. It's a bit like the old French debate, "pain au chocolat or chocolatine?". For me, it's all about how easy the pissaladière is to eat, without strips that turn into strings when you take a bite. So cutting them into squares of about 1 cm seems best, both for cooking and for eating.
With that settled, on to cutting the onions and, straight after, starting to cook them. I use a wok, which keeps the onion juices in and gives even cooking.

Keep cooking, stirring regularly.

After about twenty minutes, the onions have had their first cooking. At this stage, it's important to turn the heat down and cook on very, very low heat, stirring from time to time.

Now it's time to deal with the anchovies: rinse them to remove the salt and any remaining scales, and lift the fillets off the backbone, without forgetting to remove the tail and the dorsal fin.

Once our fifteen fish, which give thirty fillets, are cleaned, cover them with olive oil.

Heat the oil with the anchovies in a bain-marie, as shown below.

I advise against using too high a heat: keep the water simmering rather than boiling. Otherwise you risk burning yourself with the steam when stirring with the fork, and getting water into the bowl and the oil.
You'll see that the mixture comes together quite quickly if you stir constantly, and the anchovies soon start to melt.

Here you can see the anchovies have melted into the hot oil, in the space of 5 minutes.

And there we have the mixture with the right consistency.

Now transfer the contents of the bowl, the "pissalat", into the wok with the onions and cook again, to get the taste and smell of onions cooked with anchovies.

That's thirty to forty minutes of cooking, until the onions take on a lovely melting, confit look.

Now take the onion compote off the heat and leave it all to cool. It's important not to spread the mixture on the dough while it's still hot.
Topping and baking the focaccia
Nothing complicated here. Take well-washed basil leaves; I usually cut them into three pieces across their length, then cover each piece with half a tomato, which I press into the risen dough. A little fleur de sel and some coarsely ground black pepper. I add a drizzle of olive oil around the tomatoes and around the edge of the dough, for extra crispness after baking.
And in it goes, into an oven preheated to 230 °C (no fan), in which you've placed water also heated to 100 °C to create steam. To do this, I put a flat container directly on the bottom of the oven and pour the boiling water into it. Be careful not to burn yourself with the steam coming back up.
Important: I put the baking rack in the second position from the bottom of the oven, so the bottom bakes a little more than the top.

Here is the focaccia after 20 to 25 minutes of baking: a beautiful, well-risen focaccia.

Important: when it comes out of the oven, take the second oven rack, the one you're not using, and set it on your worktop. You'll put the focaccia or pissaladière on it once you lift it off the baking tray, because condensation forms between the tray and the baking paper. That could make your baked dough soggy, which would be a shame. Once out, let it cool for a while; you can always put it back in the tray afterwards if you need to transport it.
Baking the pissaladière
The oven is prepared exactly as before.
Now take the cooled onion and anchovy compote and spread it over the dough in the second tray. Don't forget the black olives. Some people add extra anchovy fillets for decoration; as some of my friends aren't fans of anchovies, I don't, and there are already plenty in the compote.

Baking works the same way as for the focaccia: about 20 to 25 minutes. And don't forget to let it cool on the rack, off the baking tray.
And there you go! A sweet smell of pissaladière fills the kitchen, and now begins the hardest part of the whole adventure: not being able to taste this masterpiece and having to wait for your guests. Good luck!
Ready to travel 😉
Please feel free to leave your comments below, with suggestions for improvement or anything else.