
Coconut olive soap
Natural soap: the ideal combination of coconut oil and olive oil

Coconut olive soap is a handmade, cold-process soap designed to nourish and moisturise the skin every day, simply.
Thanks to coconut oil and olive oil, this coconut olive soap cleanses gently while deeply moisturising the skin. Made from natural ingredients such as coconut oil and olive oil, it is ideal for sensitive skin and for fans of homemade cosmetics. "Goodbye blackheads and other impurities!"
This coconut olive soap fits easily into a daily skincare routine. Its natural composition makes it a gentle, skin-friendly choice, suitable for regular use.
A little history to start with!
Soap in ancient times
Antiquity (around 2800 BC):
The earliest traces of soap date back to around 2800 BC, in Mesopotamia, between the Tigris and Euphrates rivers (present-day Iraq).
At that time, the Sumerians used a mixture of animal or vegetable fat and ashes to clean wool. This rudimentary product was used mainly in the textile industry, because wool had to be washed before being woven.
However, it was not yet soap as we know it today. It couldn't really clean skin or greasy surfaces.
True soap appeared later, with the saponification reaction: a chemical process between a fat and a base (such as caustic soda).
In fact, the ashes used in the past naturally contained potash, a substance that reacts with fats to make a basic soap.
So this kind of preparation, although it worked, remained crude and unsuitable for personal hygiene.
Over time, techniques improved.
In particular, the Greeks and Romans began using olive oil to make finer soaps. They also brought soap into personal hygiene, rather than using it only to wash textiles.
Soap among the Romans
Contrary to popular belief, the Romans did not always use soap to wash, at least not at first. Their bathing ritual was highly developed, but relied mainly on olive oil: they rubbed it over their bodies, then scraped off the oil (and the dirt with it) using a metal tool called a strigil. It was a kind of squeegee for the body.

Soap only appeared in Roman culture a little later, probably inspired by the Gauls, who used a mixture of animal fat and wood ash, like the Mesopotamians before them. This mixture produced a more elaborate soap through the chemical reaction of saponification.
Roman authors such as Pliny the Elder, in his Natural History, mention soap (called sapo in Latin), used mainly to dye hair or by barbers, but not yet widely for washing the body.
Soap and hygiene in the Middle Ages
Here again, contrary to popular belief, hygiene was not absent in the Middle Ages. On the contrary, it varied with the period, the place and the mindset.
In the Early Middle Ages (5th to 10th century), washing was a widespread practice. Steam baths (public baths heated with steam) existed in towns, and monks followed regular hygiene rules. Bathing was seen as good for both body and mind.
At the same time, soap was developing. It was made from animal or vegetable fats mixed with ash lye. Once heated, this mixture gave a cleansing paste. Cities such as Aleppo, Genoa and Marseille became famous for their quality soaps.
However, from the 14th century onwards, things changed radically. Because of the Black Death, fear of disease spread. People began to believe that water opened the pores and let in "corrupt air". As a result, baths became suspect, and were sometimes even considered immoral. The Church condemned public baths, often associated with debauchery.
From then on, hygiene took another form. People adopted the dry wash: rubbing themselves with damp cloths, changing clothes often, and using perfumes or floral waters to stay clean without washing.
Far from being neglected, hygiene in the Middle Ages adapted to the fears and beliefs of the time. Soap improved, but bathing became rare. Cleanliness simply took another form.
Soap under Louis XIV
luxury, perfume and regulation
In the 17th century, under the reign of Louis XIV, soap became much more than a simple hygiene product. It turned into a symbol of refinement and luxury at court.
On the one hand, even though water was rarely used to wash the whole body, the dry wash became common: people rubbed themselves with perfumed cloths, used powders and, above all, used delicate soaps for the face and hands. Soap thus became an essential accessory of the nobility, in the service of appearance.
On the other hand, soap production grew strongly in the south of France, especially in Marseille. To guarantee its quality, Colbert's edict of 1688 imposed strict rules:
🔹 Use only pure olive oil,
🔹 Exclude any animal fat,
🔹 And follow a hot-process method, according to a precise procedure.
Thanks to these regulations, Marseille soap gained a reputation and became a benchmark in Europe. It was used for washing, but also for laundry and the home.
Under Louis XIV, soap became a noble, controlled product. It reflected the king's taste for order, beauty and prestige, while heralding the growing importance of hygiene in society.
Today!
Cold-process saponification
The birth of cold-process saponification
Saponification is the chemical reaction between a fatty substance (oil or fat) and a strong base (sodium hydroxide, NaOH, for bar soap, or potassium hydroxide, KOH, for liquid soap), which produces soap and glycerine.
The cold process stands out because the mixture is not heated (or only very slightly), which preserves the properties of the oils and naturally retains the glycerine (glycerol).
Chemical and industrial developments
18th century:
French chemist Nicolas Leblanc developed a process for producing soda ash (sodium carbonate), from which caustic soda can be made, making large-scale soap production easier.
19th century:
The chemist Michel-Eugène Chevreul studied the chemistry of fats in detail and described the saponification reaction. This marked the scientific birth of soap as we know it.
Thanks to the Belgian chemist and industrialist Ernest Solvay, producing soda became cheaper and much more environmentally friendly (the Solvay process).
With the Industrial Revolution, soap production became more mechanised, but the cold process continued to be used by craftspeople, especially local soap makers.
Cold-process saponification today
Since the 2000s, with growing enthusiasm for zero waste, homemade products and natural cosmetics, cold-process saponification has enjoyed a real revival.
It is valued for:
-
Its respect for the environment,
-
Its gentleness on the skin,
-
The richness of unaltered vegetable oils,
-
The fact that it retains natural glycerine.
A bit of practice
To start, you need a few ingredients and a few tools.
The ingredients:
- Pure caustic soda (pellets)
- Water
- Olive oil (organic)
- Coconut oil (organic)
- Fragrance (here, monoi oil)
The tools:
- A kitchen scale
- A whisk
- A stainless steel mixing bowl
- A bowl
- A stick blender
- A silicone spatula
- A mould
- An apron
- Gloves
- Safety glasses
- A soap calculator (here, in French)
A mould for pouring the soap batter is strongly recommended; I'd even say it's essential. I made one from plywood offcuts, sized to hold a little over 2.9 kg of batter.
Use the soap calculator to get some important information, both for your batter recipe and for working out the volume of your mould. It all depends on how much soap you want to make.

This table is very useful, because it gives the key figures for working out the mould dimensions.
By default, to make my lye solution I use an 8% lye discount, so 292.6 g of pure caustic soda pellets and 650 g of water. The total weight of the batter will be:
292.6 + 650 + 1000 + 1000 = 2942.6 g, or roughly 2.94 litres, i.e. about 2942.6 cm³
So I have the volume; all that's left is to work out the mould dimensions, keeping in mind that I want to make 25 bars of about 100 to 120 g that sit comfortably in the hand, which means they shouldn't be too big or too small.
After some observation, 5 cm high by 7.5 cm wide by 3 cm thick seems the most comfortable size for holding a bar of soap. So I have the dimensions of one bar, and I want 25 of them.
To work out the length of the mould, I multiply 25 x 3 = 75 cm, and add a small 4 cm margin so the batter doesn't overflow while pouring and things aren't too tight: 79 cm.
My mould will therefore measure 79 cm x 7.5 cm x 5 cm inside, which will give me 25 bars of about 112 g each.
Let's check the volume:
79 x 7.5 x 5 = 2962.5 cm³ for 2942.6 cm³ of batter: we're good, with a little margin.
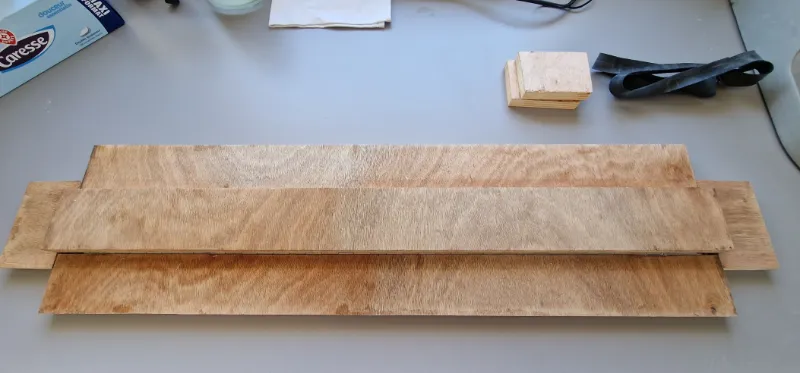
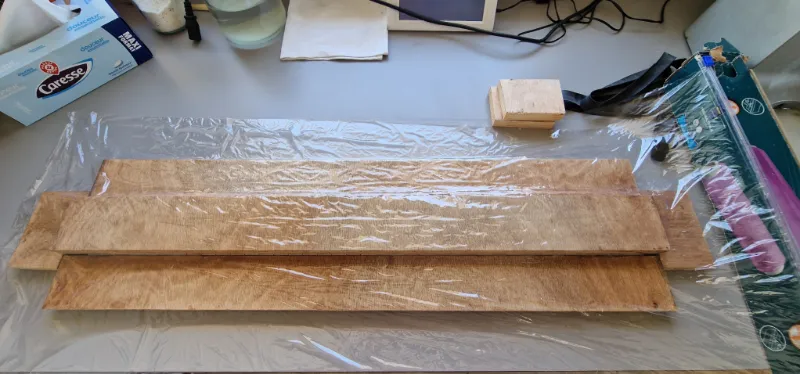
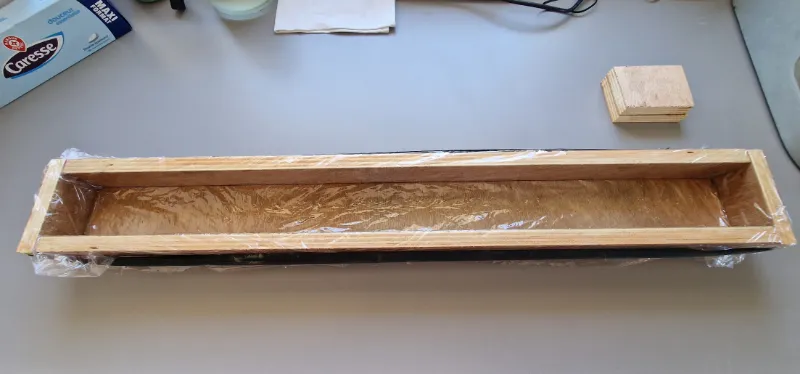
Here you can see the mould laid out in the open position, with plastic film applied to make unmoulding easier and to keep it watertight once the mould is closed.
The reason for making a mould that opens completely is mainly to make unmoulding and cutting the soap easier.
Right! Let's get down to business: making the soap.
We've already covered the ingredients and tools, so off we go.
Step one: the lye solution.
WARNING!!! WARNING!!!
Remember that these are chemicals that must be kept out of reach and handled with care, and above all, protect yourself (gloves, glasses, and a cotton apron, not nylon) before handling anything. It is very important to mix the solid caustic soda and the water in a well-ventilated area, as the fumes are harmful. Don't use plastic containers, because the mixture of water and pure caustic soda heats up very quickly as soon as you mix them: use glass or stainless steel instead.
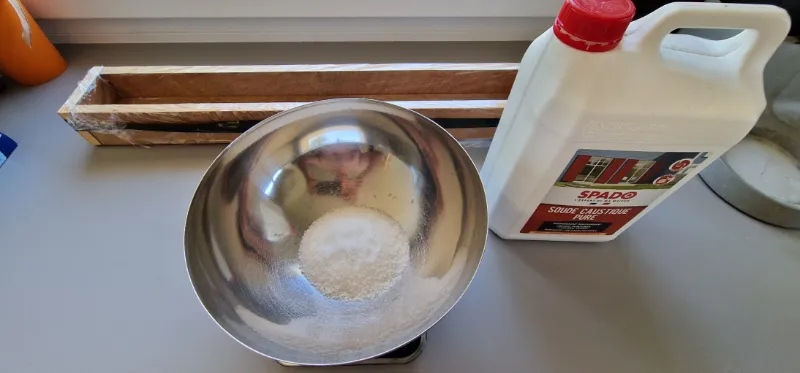
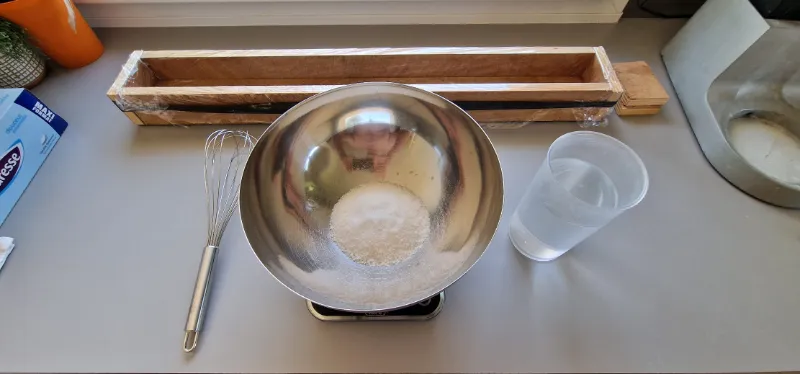

Once the mixture has cooled, we can move on to the next step.
Step two: mixing in the oils.
STAY PROTECTED!!!
Now we can add the various oils, butters or other fats, depending on the chosen recipe. Here, we add the olive oil and coconut oil to the lye solution.

And off we go with the blending.

Blend until "trace", the moment when the soap batter leaves a trail when you stir it. Now it's time to add the fragrance. It is made of essential oils and cornflour, which helps the scent last after saponification.

Once this last ingredient is mixed in, it's time to prepare the mould for pouring.

Step three: pouring
This step isn't very technical in our case, but it's where you can shape the soaps or, if you use colour, create patterns.
Done: the soap batter is transferred into the mould.

Now the saponification reaction needs to take place. You'll see that this reaction gives off heat, and the soap loaf will change colour as the glycerine forms.

Step four: unmoulding and cutting
Unmoulding is made easier by the plastic film on the walls of the mould. For cutting, you can either use what's called a soap cutter (a "guitar"), which isn't cheap, or, as I do here, a large, very sharp knife, cutting cleanly from the top by pressing down on the blade, carefully of course.
The next day, the soap loaf has set well and can be taken out of the mould.

As the soap loaf is still a little soft, it can now be cut into bars.

Step five: curing
"WARNING": an essential step
The soap made here now needs time to cure, usually four weeks. This time is needed for the saponification process to finish and for the soap's pH to come down to a level that is gentle on the skin (around 9 to 10 for a cold-process soap).
And now, four weeks of curing.

